Building an explorable 3D scene with Codex, Blender and Three.js

The author describes breaking down a reference image, generating and repairing models, optimizing GLB files, rigging a character and adding web interactions, including connection failures and scene-detail problems.

Creating an interactive 3D scene from scratch, with no prior experience.
This 3D world is what I put together this time using Codex and Blender. The entire scene can now be opened in a local browser, and a character can enter and explore it.
Running, jumping, walking to the dock to sail a boat, using a pickaxe to gather ore or fishing by the river… Most of the work behind all this was handed over to AI.
I only needed to provide reference images, specify what I wanted and check the results. AI handled most of the modeling scripts, web code and subsequent revisions.
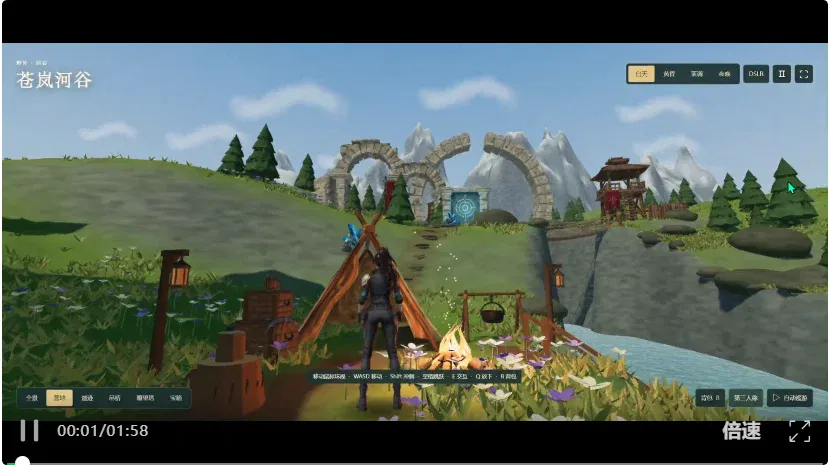
First, a word about the tools: this time I used Codex, Blender and Three.js.
Codex wrote the code and coordinated operations; Blender created and exported the models; Three.js made those models appear and move on a web page.
Of course, an agent such as WorkBuddy could also be used in place of Codex here. The final result still depends on the model.
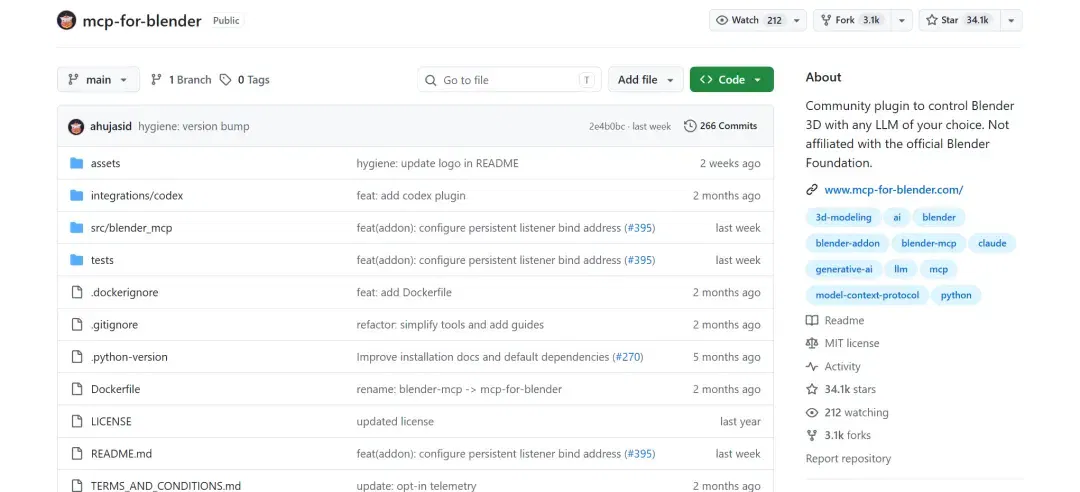
Blender can be downloaded for free from its website. After installing it, you also need to configure Blender MCP so that Codex can view and manipulate the objects in the software.
If this is your first time using it, you can refer to this open-source project: just give the link to your agent and have it install it.
After installation, restart Codex and Blender, and confirm that MCP for Blender is enabled in Blender’s add-on settings. In the 3D view, press N and find the MCP panel. If it has not connected automatically, click to start the service.
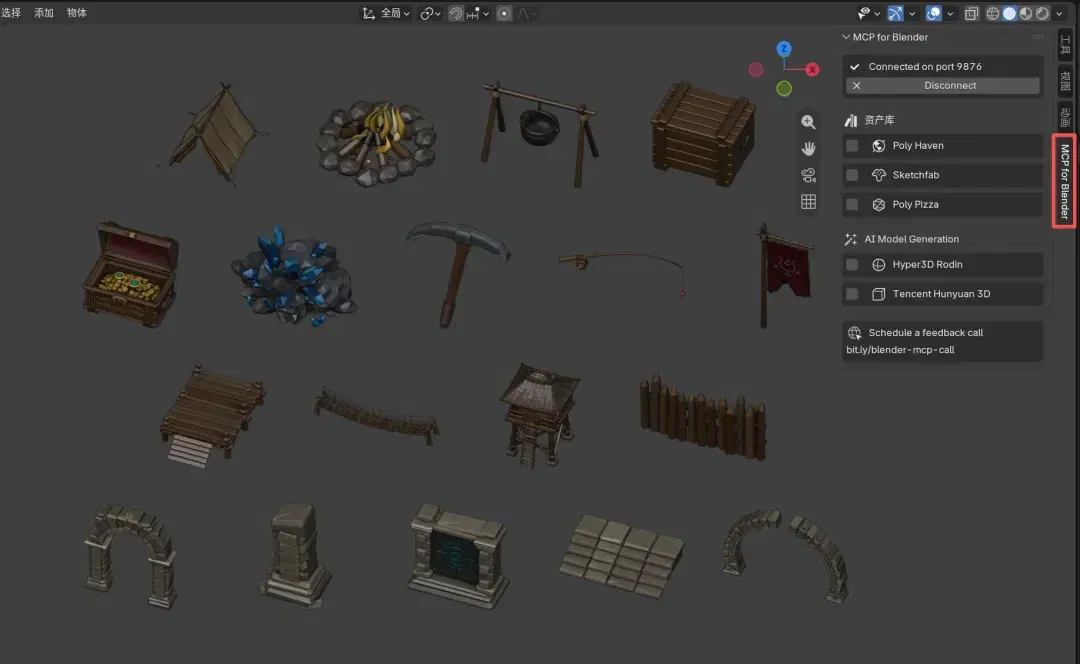
As a test, first ask Codex to create a cube, change its color and save the project. If you see the object in Blender change accordingly, this step is essentially working.
Now the real work begins. First use image generation to create the scene you want to build, then send the reference image to Codex and ask it to identify the objects in the scene.
I did not ask it to reproduce the entire image in one go, because the more models there are, the harder it is to locate problems. We first separated the elements in the image, making the tent, campfire, treasure chest, wooden bridge, watchtower and stone ruins as independent props.
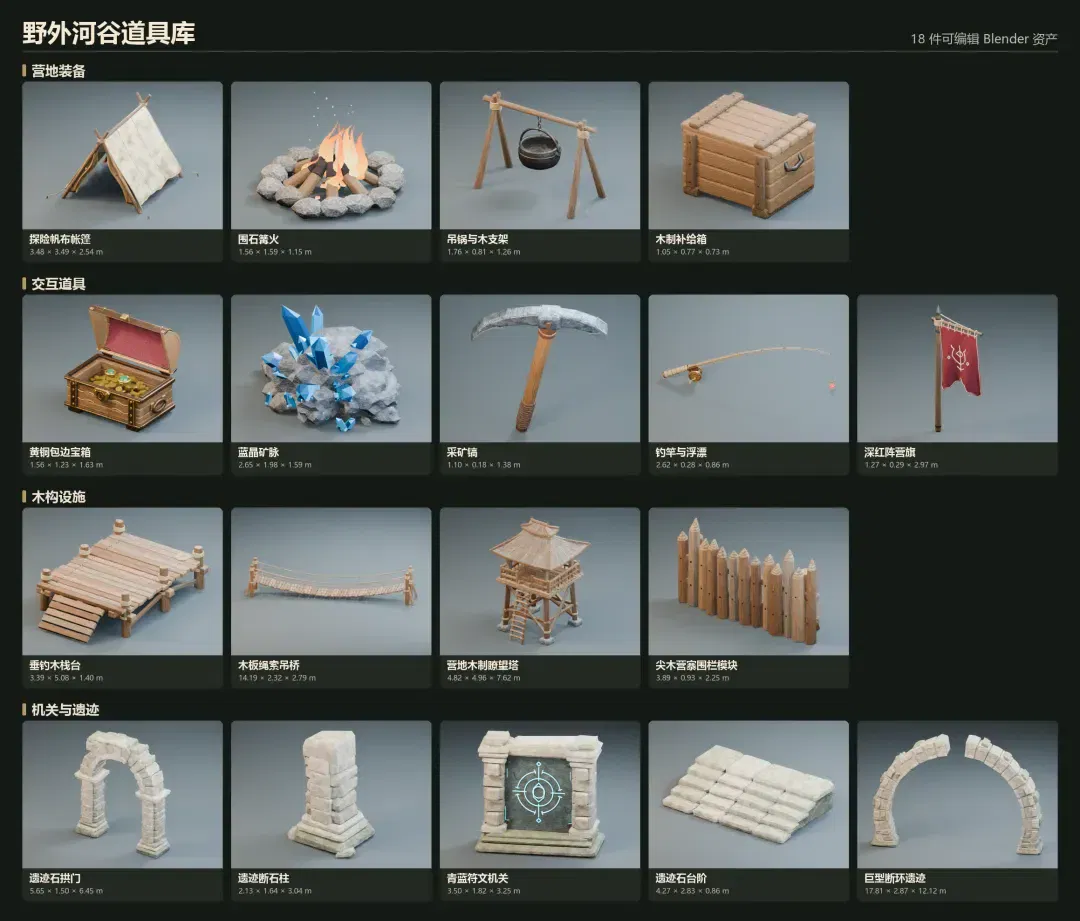
Initially, we listed 18 props in four groups: campsite items, interactive objects, wooden structures and ruins. Each had its own dimensions, materials and file.
The first round of instructions to Codex could look like this:
Analyze this reference image and list the 3D props that need to be made. Do not build the complete terrain yet.
Classify them into campsite items, building structures, interactive props and decorative ruins. Determine the approximate dimensions, orientation and purpose of each object.
Prefer Blender Python to create models with clear structures that are easy to modify. Save them separately and generate an overview image of all the props.
Codex then called Blender’s Python interface to build the models. For the wooden bridge, for example, it first generated posts, crossbeams and planks, then arranged ropes along a sagging curve.
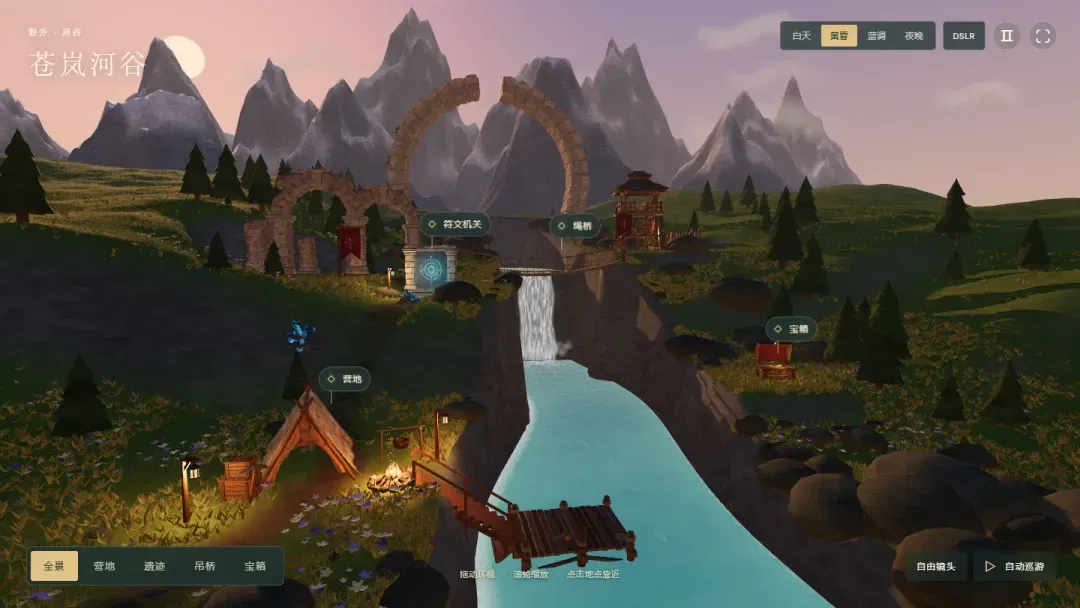
For the treasure chest, it separated the body from the lid and retained a pivot for the lid, so there would be something to move when the character opened the chest later.
There was a small problem during this process. Blender’s live connection dropped at first, so I asked Codex to switch to writing Python scripts and run them through the local Blender instance in the background.
In other words, scripts provide an alternative to MCP. Even if the connection has a problem, work on the props can continue.
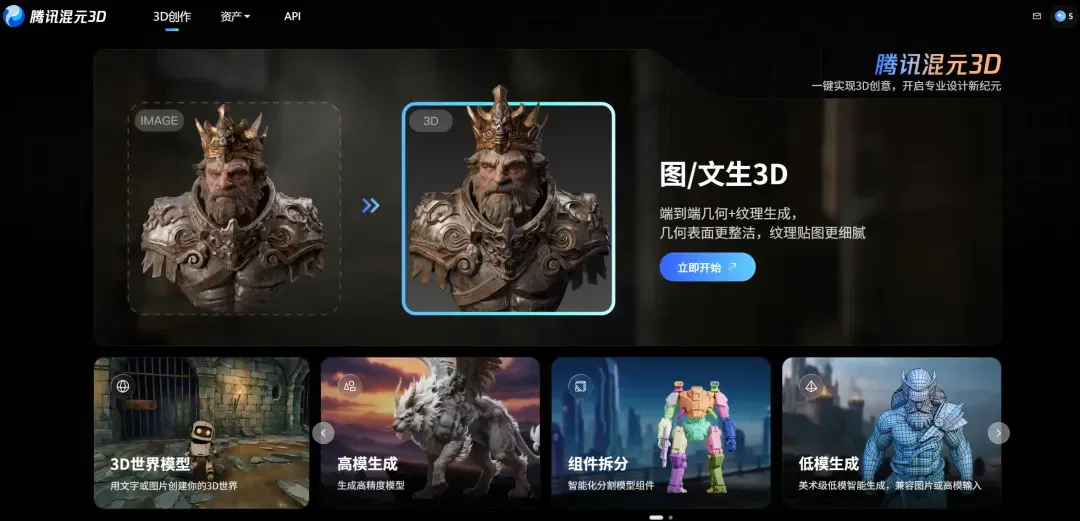
Of course, there is no need to have AI model absolutely everything through code.
More complex objects can be handed to an AI 3D-generation tool. This time I used Hunyuan 3D, mainly because it provides downloadable models that are convenient to process further.
If you care more about the quality of the shapes, you could also try Tripo, Meshy or Hi3D. You need to check each product’s free allowance and export conditions yourself.

There is an even simpler approach: find ready-made models.
For example, on Fab’s Quixel Megascans asset pages, you can search for rocks, wood and all sorts of environmental props.
The small boat, old gourd and container used this time were external GLB assets. After downloading them, I handed them to Codex for processing. The container was eventually turned into a fish basket beside the dock.
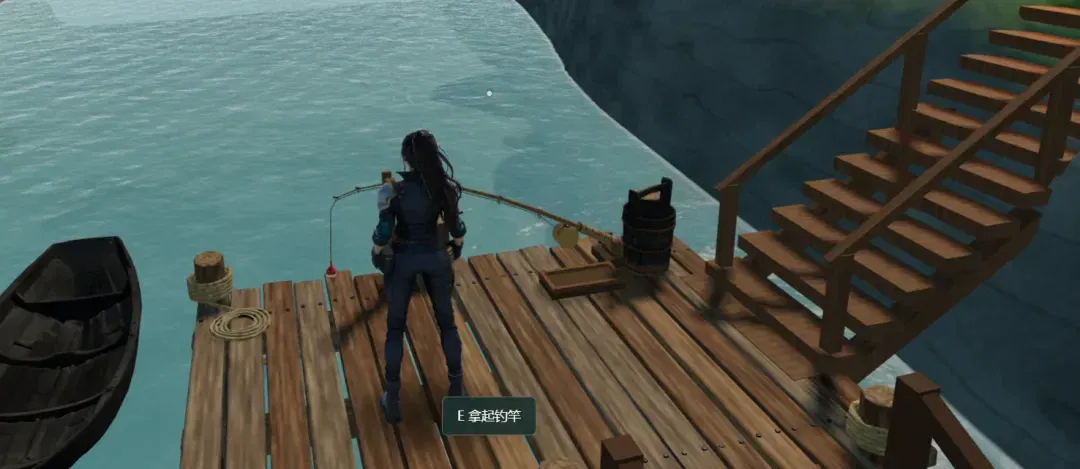
My overall takeaway is to build simple, regularly shaped objects with code, use generation tools for complex shapes and adapt existing high-quality assets. The time saved is better spent polishing the scene as a whole.
But a model looking presentable does not mean it is ready to use directly.
The first inspection revealed quite a few problems: tent supports were floating in the air, suspension-bridge ropes did not connect to the ends of the bridge, the chest hinges were not quite right and some rocks intersected in implausible ways.
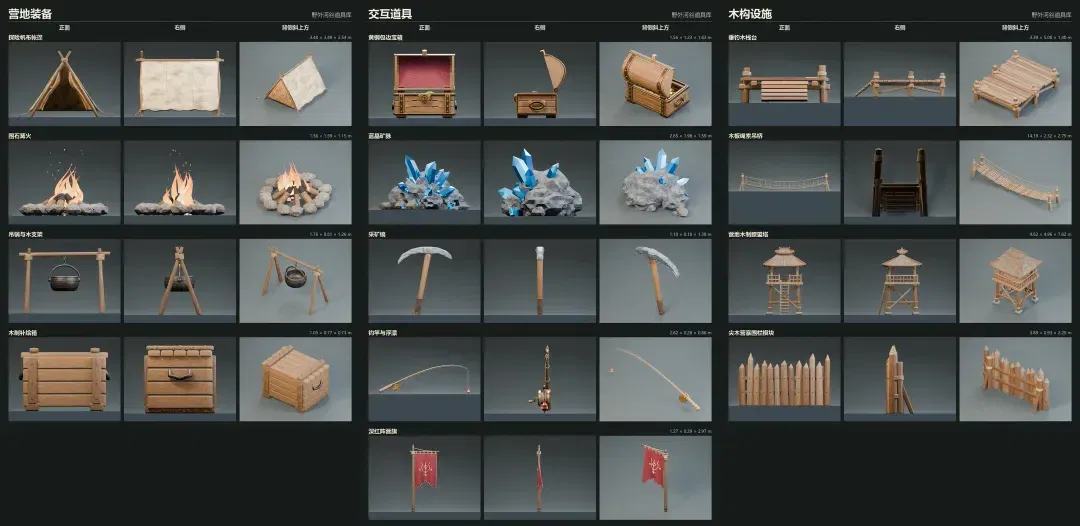
I asked Codex to render front, side and rear three-quarter views of every prop. That produced 54 inspection images for the 18 models, which were then repaired one by one:
Generate three inspection images for each prop: front, side and rear three-quarter views. Focus on floating parts, mesh clipping, broken faces, structural connections and model origins.
When a problem is found, repair only the corresponding model and render it again after the change. Make sure the treasure chest’s lid can rotate independently and that the bridge and building support structures are complete.
Next came exporting the models.
I used GLB format here, which packages the model and materials into a single file for the web page to load later.
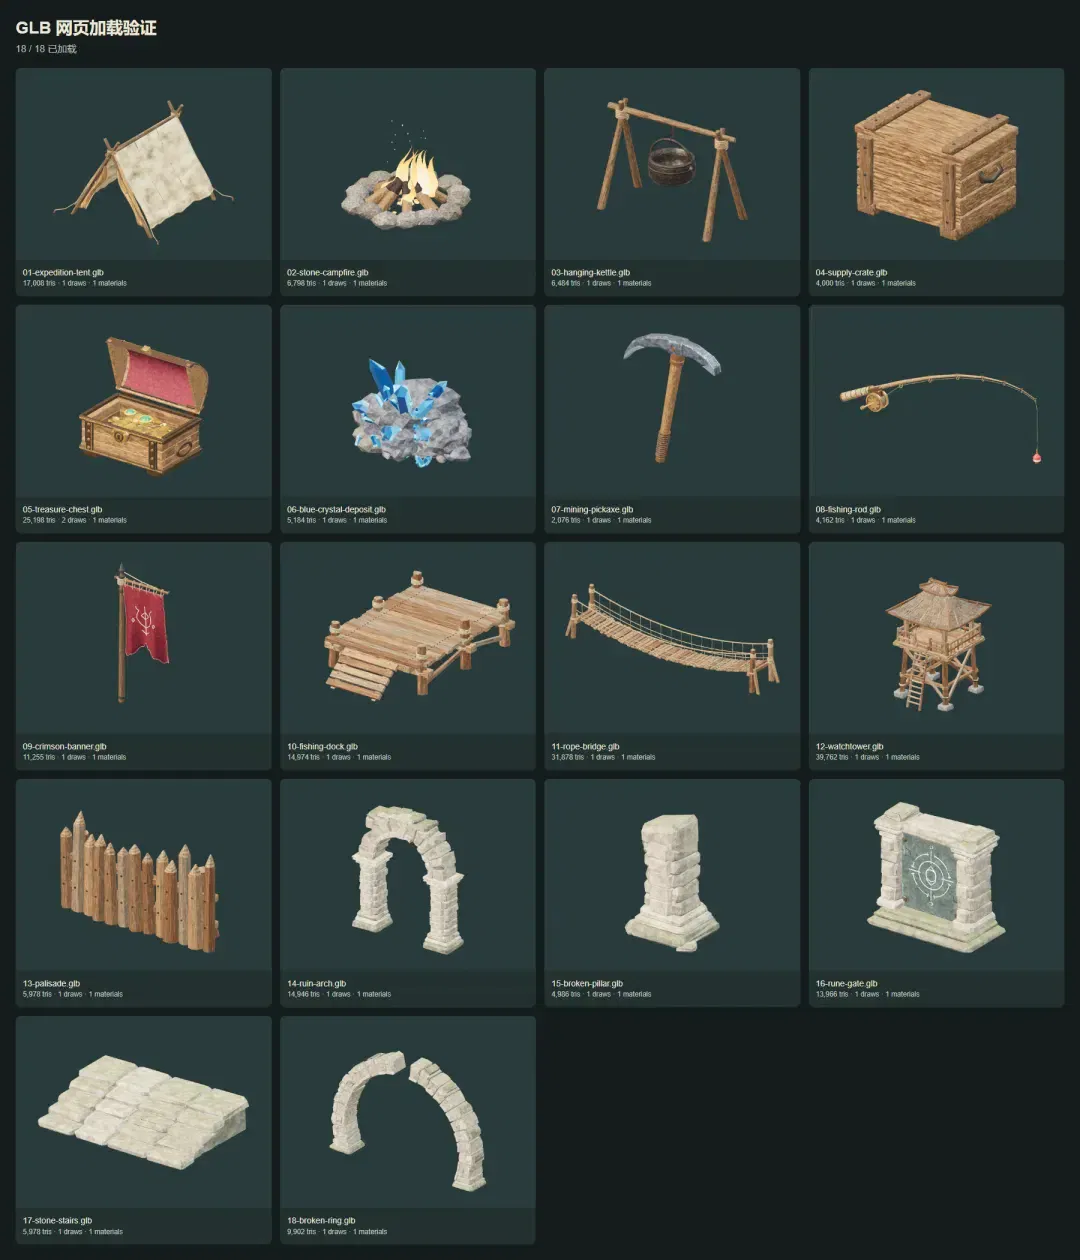
Codex also handled polygon reduction, texture organization and file compression. The triangle count for the 18 self-built props fell from about 463,000 to 225,000, and the final GLB files totaled approximately 30.2 MB.
This step is important for smooth loading in a browser. Once the props are more or less ready, they can be brought together in the same space.
I asked Codex to create a new TypeScript web project, load the GLB files with Three.js and arrange the terrain, river channel, paths and model positions according to the reference image.
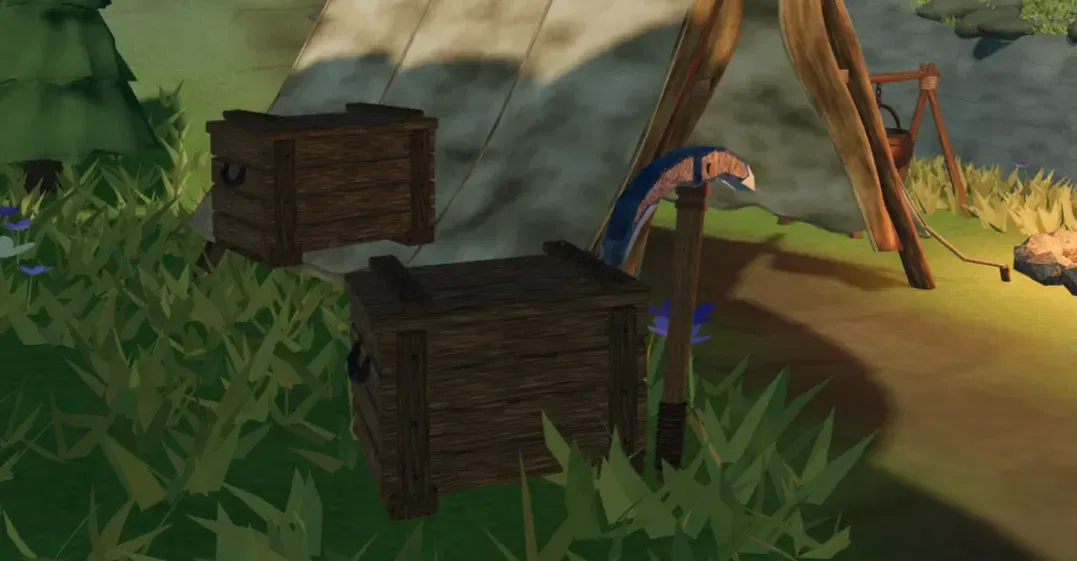
The biggest trouble here was positioning.
Some wooden crates appeared to be on the ground, but in fact only their model origins touched it; their bottoms were still suspended in the air. We later changed this to checking each object’s actual bounds before adjusting its height.
The waterfall had a similar problem. Initially, the water surface did not meet the rock face. Only after revisions did the upstream flow connect to the waterfall’s edge.
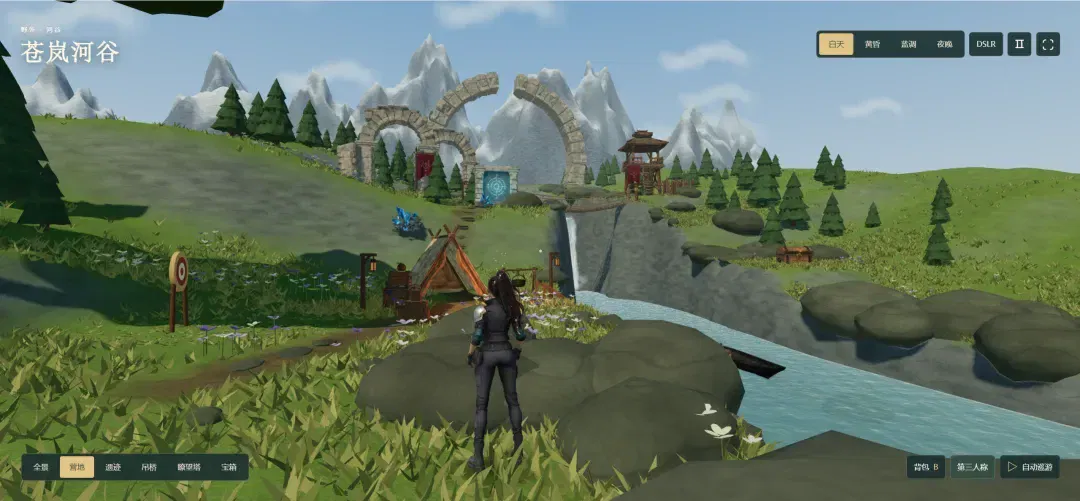
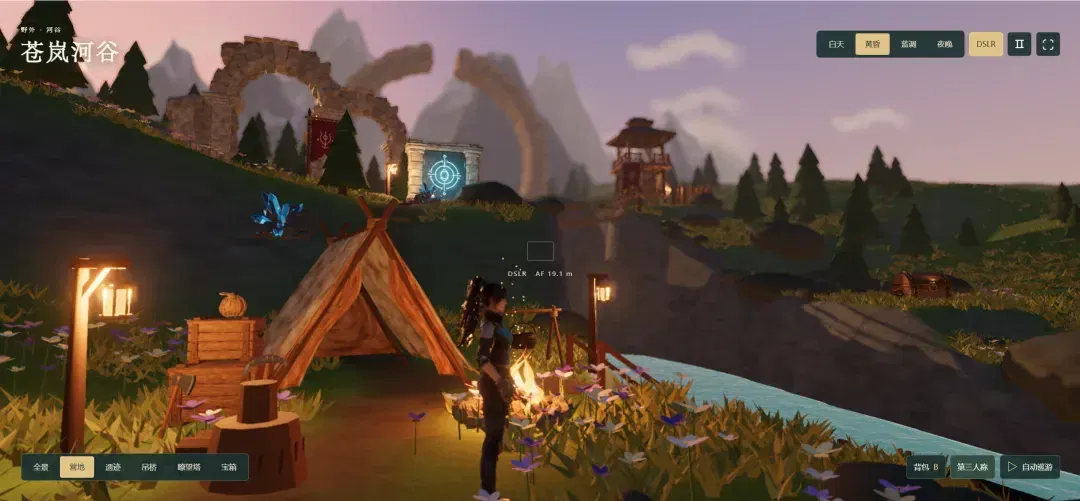
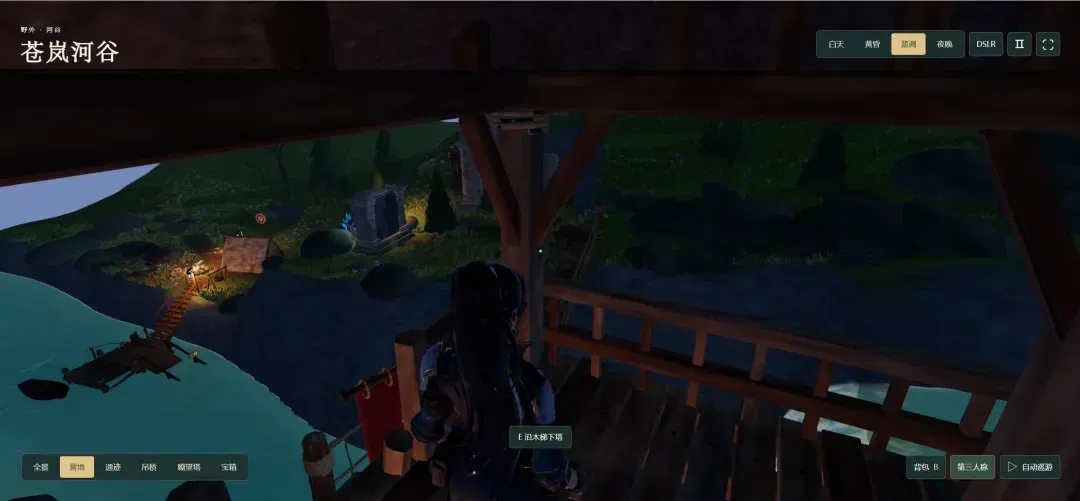
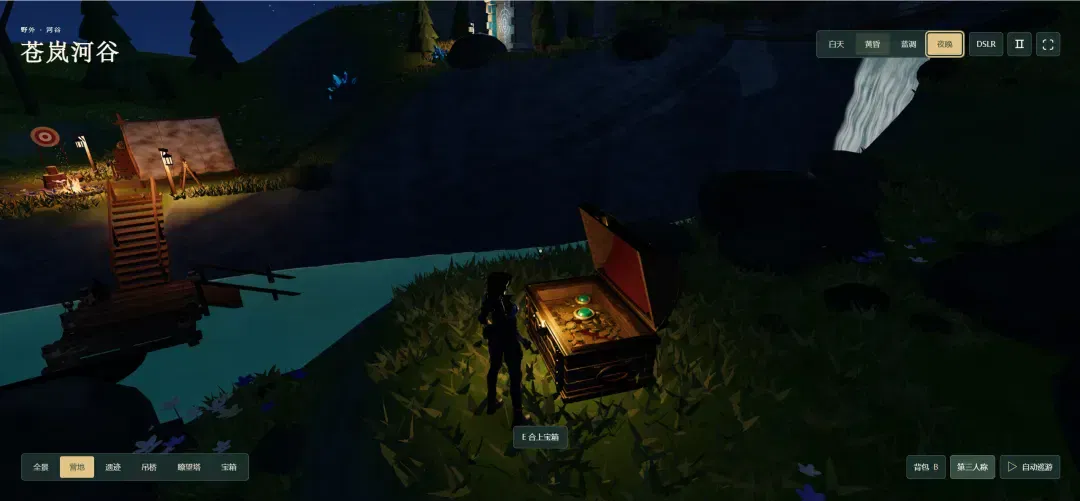
Once the scene was assembled, I asked Codex to add four lighting setups. Daylight makes the buildings and paths clearly visible; at dusk, sunlight enters the river valley at an angle; blue hour is better for wide shots; and at night, the campsite lights come on.
The page also gained a photography mode with adjustable depth of field and bloom, which is well suited to making showcase videos.
At this point, there was already a 3D world that could be rotated and viewed. But I also wanted to walk into it myself from a third-person perspective, so I continued by adding a character.
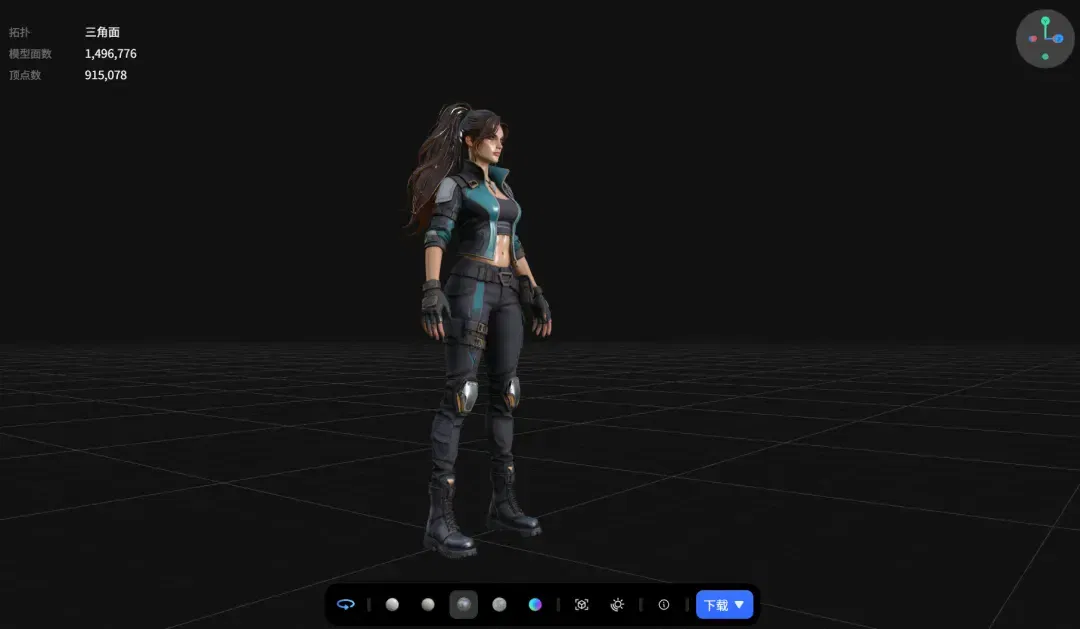
The character model was also imported through GLB. The trouble was that the character initially had only an appearance, with no skeleton or animation.
To make her move her legs, raise her arms and climb ladders, she first needed a skeletal rig.
I handed this to Codex too. It first compressed the character model from around 86 MB to about 5.3 MB, then created 23 bones for the character and integrated her into the web page’s character system.
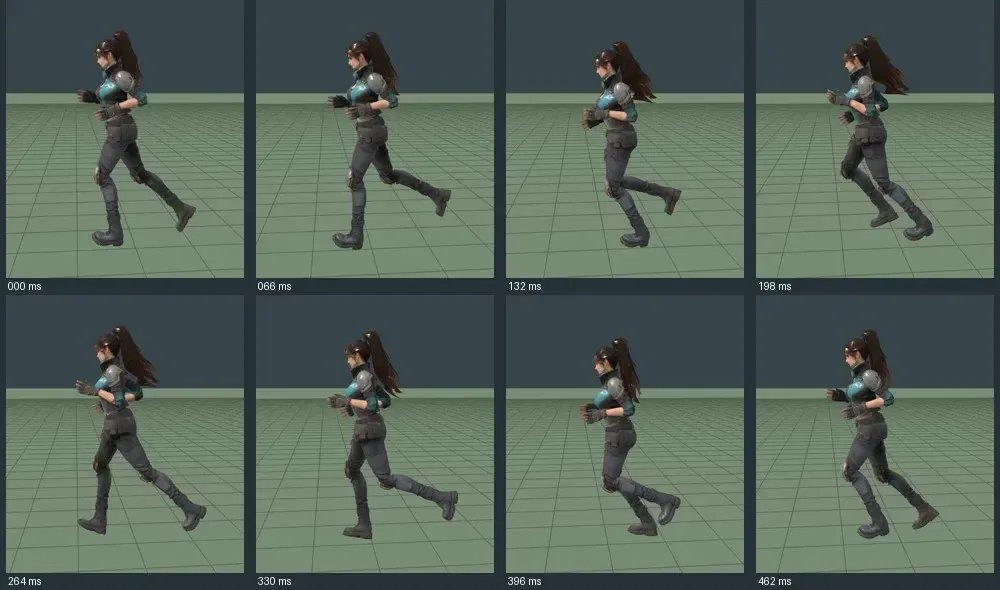
The first attempt was rather funny. The character’s movements were extremely stiff, the pickaxe she held was oversized and awkward, and her running looked like a robot dog’s.
I then asked Codex to keep adjusting the hand and foot joints and to incorporate CMU motion-capture data from real people to handle walking and running. The grip was then aligned with the tool’s direction.
Once the body could move, she also had to actually stand on the ground. Here, the Rapier physics engine was used to determine contact between the character and slopes, stairs, the dock and the boat deck.
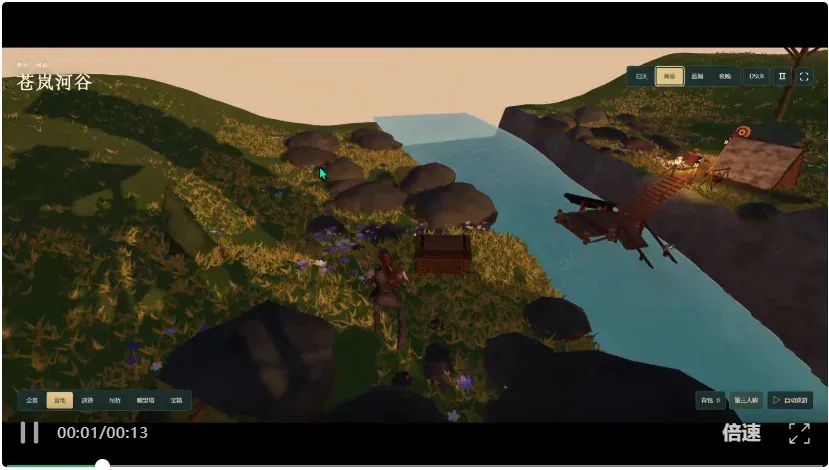
Other interactions were also added little by little.
What stood out most at this stage was that visual appearance is only the starting point of a 3D scene. Once users can roam freely, many subtle problems with the details become apparent.
Finally, I had Codex do a dedicated round of browser compatibility checks and adjust the layout for different window sizes. Only then were these details more or less taken care of.
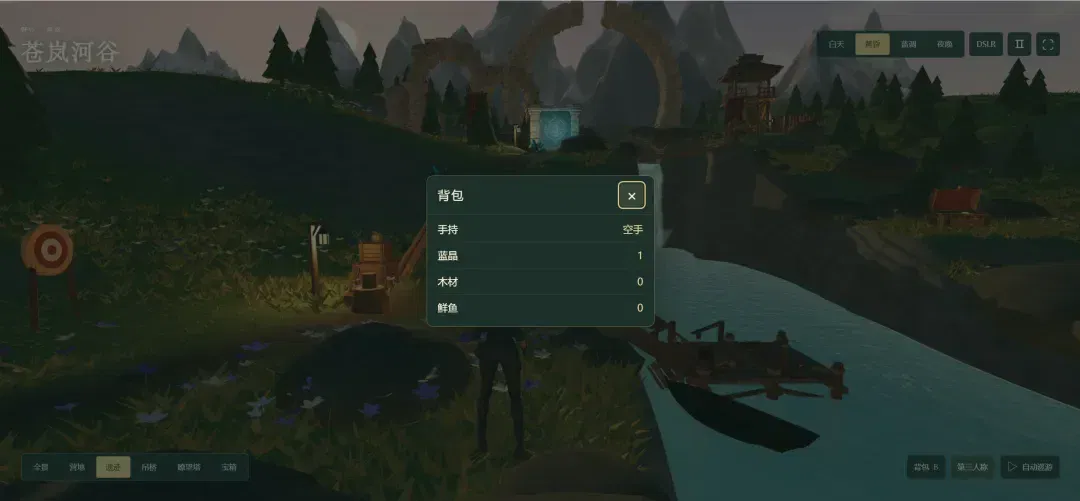
After all that tinkering, looking at recent progress in AI-built 3D worlds really does feel a little astonishing.
Recently, Anthropic engineer Felix Rieseberg used the newly released Claude Fable 5.2 to generate a first-person shooter called Saltline in about eight hours.
The entire process used just one prompt, with no human feedback along the way. Even the game’s 3D models, textures and sound effects were generated through code.
The cost was not low, however. According to figures provided by the developer, API charges came to approximately US$550.
Although current models have long been capable of making 3D scenes, what is more striking this time is how complete the work is. By continually writing large amounts of code, they can turn a simple idea into a virtual space that you can experience for yourself.
“Language is the world” sounds a little exaggerated, but we can already see some signs of it now.
As models’ ability to write code and understand space continues to improve, perhaps in the future you will only need to describe a place you want to visit for AI to build a world you can walk into.
And a little while ago, when Fei-Fei Li and the World Labs team were discussing world models, they also mentioned a particularly interesting direction.
Language models are good at predicting the next word, and video models predict the frames that follow. Their hope is for AI to understand what the surrounding world should look like after the observer’s position changes.
Only then will spaces created this way have the potential to support further editing, interaction and simulation, rather than remaining merely a beautiful video.
This approach could be extended in the future to interactive stories, virtual exhibition halls or online 3D experiences.
As for the next step, I would rather try having the character chat naturally when she encounters an NPC, and see what other stories might unfold in this river valley.
This article comes from “Xiagu AI,” by the Xiagu Content Team.
Related topics
After reading
Join the AINRK community
Read how to join the community and connect with people working in AI.
Related articles
Continue reading related topics and articles in this category.

HolyMolly links AI-generated 3D assets with game creation and interactive communities (opens in a new tab)
The article follows Tripo's move from generating assets to building games, covering text-based creation, Remix and examples. It also examines interaction continuity, gameplay and runtime quality as the platform explores an interactive-content community.

OpenAI 工程案例用 GPT-6 Astra 设计 Codex 掌机原型 (opens in a new tab)
OpenAI 两名员工用 GPT-6 Astra 设计掌机外壳、电路与固件,再经人工审查和制造修改,完成小批量原型。报告还分享了赛车零件与汽车仿真案例。
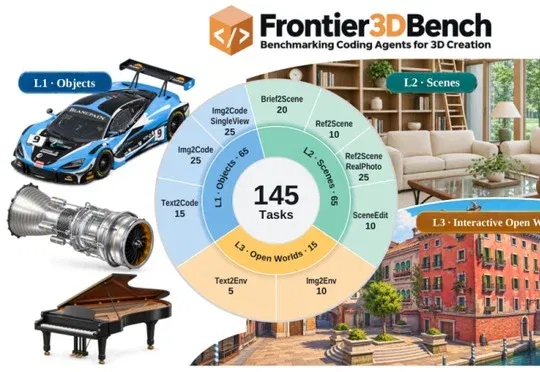
Frontier3DBench 测量智能体制作 3D 物体、场景与开放世界的能力 (opens in a new tab)
Einsia AI 用 Blender 和 Unreal Engine 中的 145 项任务比较 11 种模型与工具组合。评测发现连续移动、避障和状态管理比局部交互更容易失分。

VAST 受访者谈 Agent 与3D创作:原生网格、分层世界模型和研究机会 (opens in a new tab)
VAST 研究者围绕 Tripo、Project Eden 与创作者案例,讨论可编辑3D资产如何接入智能体流程,以及显式状态与实时渲染的分工。文章也介绍人才计划和团队经历;性能、融资与职业体验均保留公司及受访者口径。

OpenAI 计划12月合并 ChatGPT 与 Codex 用量额度 (opens in a new tab)
OpenAI 公布12月起在 ChatGPT 与 Codex 间共享套餐用量的安排,Instant 聊天不扣减这份额度。近期 Pro 增额也有区别:Pro 100、500 的 Work/Codex 额度翻倍,Pro 200 仅原本较低的额度翻倍;以 token 衡量用量不等于按 API 价格逐次收费。